Sunday, May 18, 2014

Birthday Banners

.........Birthday Banners.........
A fun way to brighten up birthdays

I've been writing guest blogs for DCWV (http://dcwvinc.blogspot.com/) and thought you all might be interested in those posts too. Here are some of the projects I've been featuring there, with a little more instruction so you can make the crafts too. Enjoy!


For my friends at work I make birthday cards for everyone in the office to sign but I can't stop there. Everyone needs something to make them feel extra special on their birthday, so I've been making mini-banners to drape across their computer screen or the back of their chair. It is a fun little touch that makes the day feel like a celebration. The mini-banners are really cute on cakes too. (To put the banner on a cake, I tie the ends of the banner to two decorative drinking straws or two dowels and stick them into the cake top.)


You can also tie the mini-banners to a card to mail to a far away friend. I bet getting a handmade card with cute little banners would make anyone's day.


The banners are easy to make even if you don't have a template handy. Here is how you make your own:

1) Cut basic shapes from folded scratch paper to create templates of any shape and size.


2) Punch a hole in the top corner of the folded paper to make evenly spaced holes.


3) Use the templates to cut the individual flags from scrap paper. (I used the Chalk Art Paper Stack here. This paper is available at Hobby Lobby Craft Stores.)


4.) String the flags together on twine, floss, or ribbon and embellish with flowers cut from the paper or with buttons.


P.S. The chalk paper easily erases with a damp cloth. It is very forgiving and reusable too. I used chalk markers to decorate this larger banner with the intent that the name, age, and occasion could quickly be changed for the next celebration. It is very handy to have a reusable custom banner ready at a moment’s notice. (This banner is made from The Chalkboard Paper Stack by DCWV. It is available at Michael's Craft Store and JoAnn's Craft Store.)


I've made a printable version of the mini-banner's instructions for your craft library. I don't know about you, but I like to keep an inspiration library on hand for when I'm drawing a blank in the creativity department

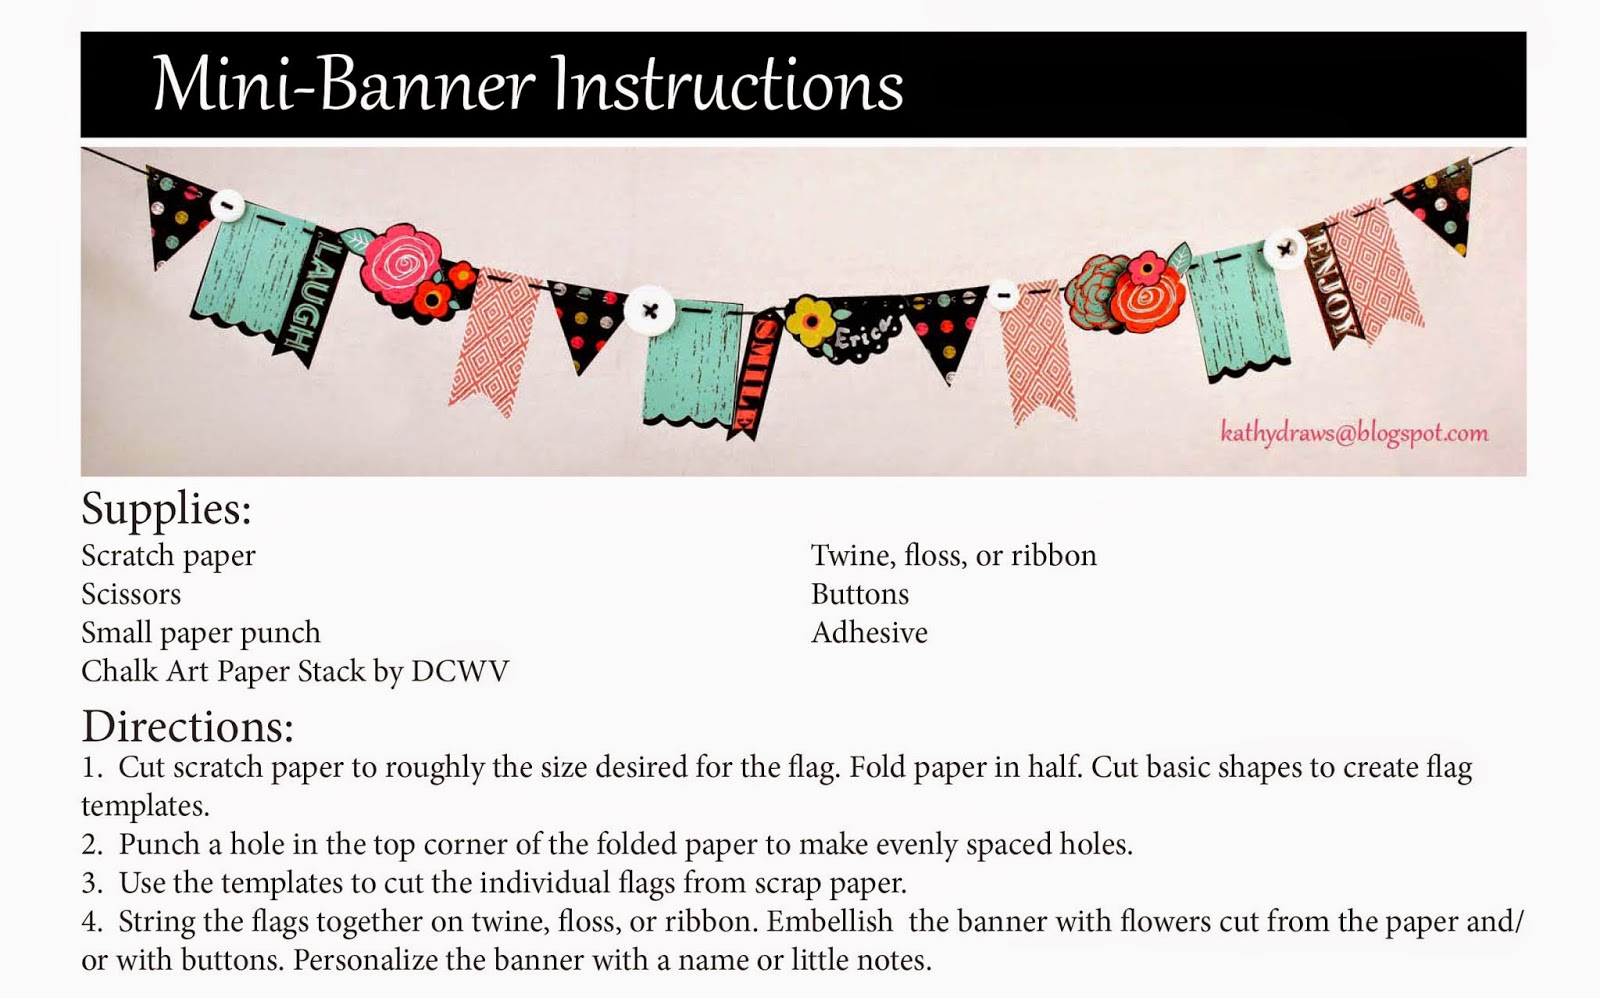
Do something happy today!

Friday, January 31, 2014

Stomping around

...Stomping around...
A Playful Dinosaur Card
This week I got to guest blog at DCWV where I’ve worked for years. I shared a tiny bit about me and some crafting techniques. You can visit DCWV’s blog here: http://dcwvinc.blogspot.com/2014/01/behind-scenes-at-dcwv.html.

Cards are my favorite thing to make so naturally that is what I choose to feature. Because cards are small scale they are fast to make and a whole lot less intimidating than staring at a huge blank scrapbook page wondering what in the world to do. Cards are just cute and fun. I especially enjoyed playing around with ribbon scraps on the dinosaur card I made for the blog feature. Here are the instructions to make the dinosaur card:

Have a wonderful day!

Sunday, January 5, 2014

All that Glitters Party

.......All that Glitters.......
GolSparkly Birthday Party


Photo by Kathy Dobson
Anything glittery gold catches my eye. So when I found that a new co-worker loved gold things I set out to make something special for her birthday. Sparkly gold details in gilded foil and glitter make this little party pretty much perfect.

Photo by Kathy Dobson
Diana Bales made the beautiful cupcakes dusted in gold powder and glittery stars. They were just as delicious as they look. She said the trick is to add soda pop or sparkling water to the cake batter.
Photo by Kathy Dobson

A mini banner strung across the card and a monogram medallion make the birthday wishes extra special. These are the pieces used to make the card.  

Photo by Kathy Dobson

Photo by Kathy Dobson
The medallion begins as a rectangle scored horizontally across the center and vertically every ¼”. Then the corners of the left side are adhered together and the same on the right side creating a circle. The medallion is attached to a banner shape on the card. Layers of circles and a monogram complete the medallion.
Photo by Kathy Dobson
The flag shapes are strung together on glossy embroidery floss and attached to the card. Sticker letters spell a gilded “happy birthday.” Gold thread accents woven into rickrack finish the card.
Photo by Kathy Dobson
A helpful trick is to turn the paper punch upside down to see exactly where it will cut.
Photo by Kathy Dobson
The circles were originally intended to hang from gold balloons tied to the office chair. Once the letters were printed and attached to the double sided glittery circles the balloons were too weighed down. Strung together the circles would make a great banner draped across the chair or screen. These circles ended up decorating the desk like giant confetti.

I hope you enjoy the photos of this little glitzy gold party. I had fun making it and sharing it with all of you. Have a dazzling day!


Saturday, December 28, 2013

A New Year Party Banner & a New Adventure

.........A New Year.........
A Party Banner & A New Adventure

I find myself too comfortable in the way I’ve always done things. I like routines, schedules, and familiar places. I like to know what I am getting into before I commit. I’m not one for New Year’s resolutions because I make little changes as I go rather than one big push for something new all at once.

This year I’m trying something different. I don’t have a specific resolution, just a challenge. I want to push myself to try new things. Jump into new projects and see what happens. Change is hard but how else do you grow?

I’ll start to step out of my comfort zone by learning something new. There are so many things I want to learn, photography, design on the computer, home improvement, business, painting, repairs, publishing…lots of stuff. If I get a chance, I’d like to share what I learn with all of you throughout the next year.

I’d like to challenge you to try this little adventure too by doing something outside of your comfort zone. Maybe we can try something new and learn together. What do you want to try?

P.S. Here is some inspiration for a New Years Party. Enjoy!

Have a Happy New Year!


Tuesday, December 24, 2013

A Merry Christmas to All

..........A Merry Christmas to All..........
Wishing you and yours a Merry & Bright Holiday!


Saturday, December 21, 2013

A Simple Snowflake Card

....A Simple Snowflake ....
Last Minute Christmas Card Idea
Sometimes simple is better. This is especially true when Christmas is just around the corner. If you need a quick card idea, this simple card is for you. You can make it like this:

Thursday, December 19, 2013

A Merry Little Christmas Hot Cocoa Gift

..A Merry Little Christmas..
Easy to Make Hot Cocoa Neighbor Gift
I hope everyone is enjoying their holidays.  I’m trying to make all my Christmas preparations a bit simpler so I don’t stress out so much. A sweet little Christmas with my family sounds much better than an exhausted mom missing out on the family time. This year I just want a merry little Christmas with cozy comforts like hot cocoa and fuzzy socks. What a fun thing to share with the people I care about! 

This is an easy to make hot cocoa gift if you want to share the warm cozy feeling with your neighbors too. I used the Home for Christmas Paper Stack from DCWV to decorate the can of hot cocoa. 
Have yourself a very Merry Christmas!